How to get started
MacOS
(Compatible with both Intel and Apple Silicon MacOS: Mojave, Big Sur, Monterrey and Ventura)
- Download the latest MacOS release from the GitHub Releases page:
Install PyMOL https://pymol.org/2/ in your Applications folder (takes minutes).
Double-click the .app file to open FREEDA GUI (it might take a minute to load).
Make sure you have Rosetta 2 program installed on MacOS with Apple Silicon chip
Linux
(Compatible with Ubuntu 22.04 LTS release https://ubuntu.com/download/desktop)
- Download the latest Linux release from the GitHub Releases page:
https://github.com/DDudka9/freeda/releases/tag/v1.0.10-linux
"Right-click" the FREEDA file -> go to Properties -> go to Permissions -> tick Allow executing file as program
Press ctrl + alt + t to open Terminal window.
Drag and drop the extracted file and press ENTER to open FREEDA GUI (it might take a minute to load).
Windows
FREEDA is not available for Windows. However, it is easy to run FREEDA from a free VirtualBox running Linux inside a Windows computer. Setting up a VirtualBox takes minutes.
Setting Up a VirtualBox (10 min)
One way to set up a virtual machine is:
Download a commonly used VirtualBox from https://virtualbox.org/wiki/Downloads.
Download Linux version Ubuntu 22.04 LTS from https://ubuntu.com/download/desktop. In general, operating system files have the suffix ".iso".
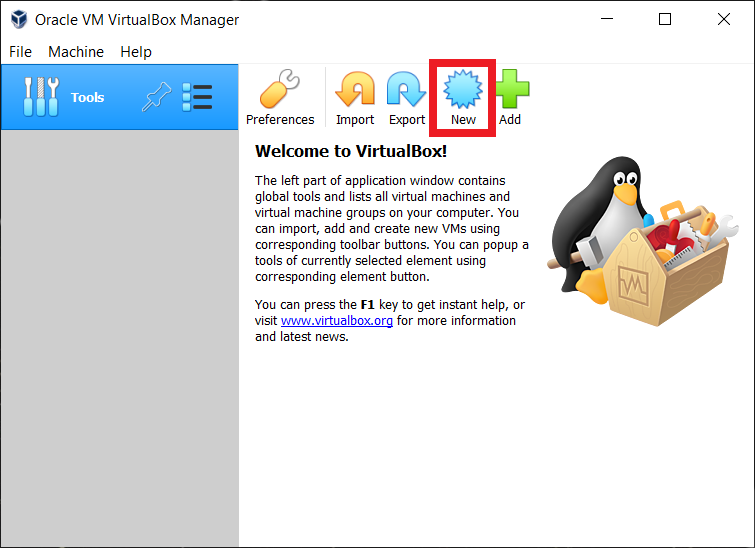
Open VirtualBox and click on "New" to create a new virtual machine.
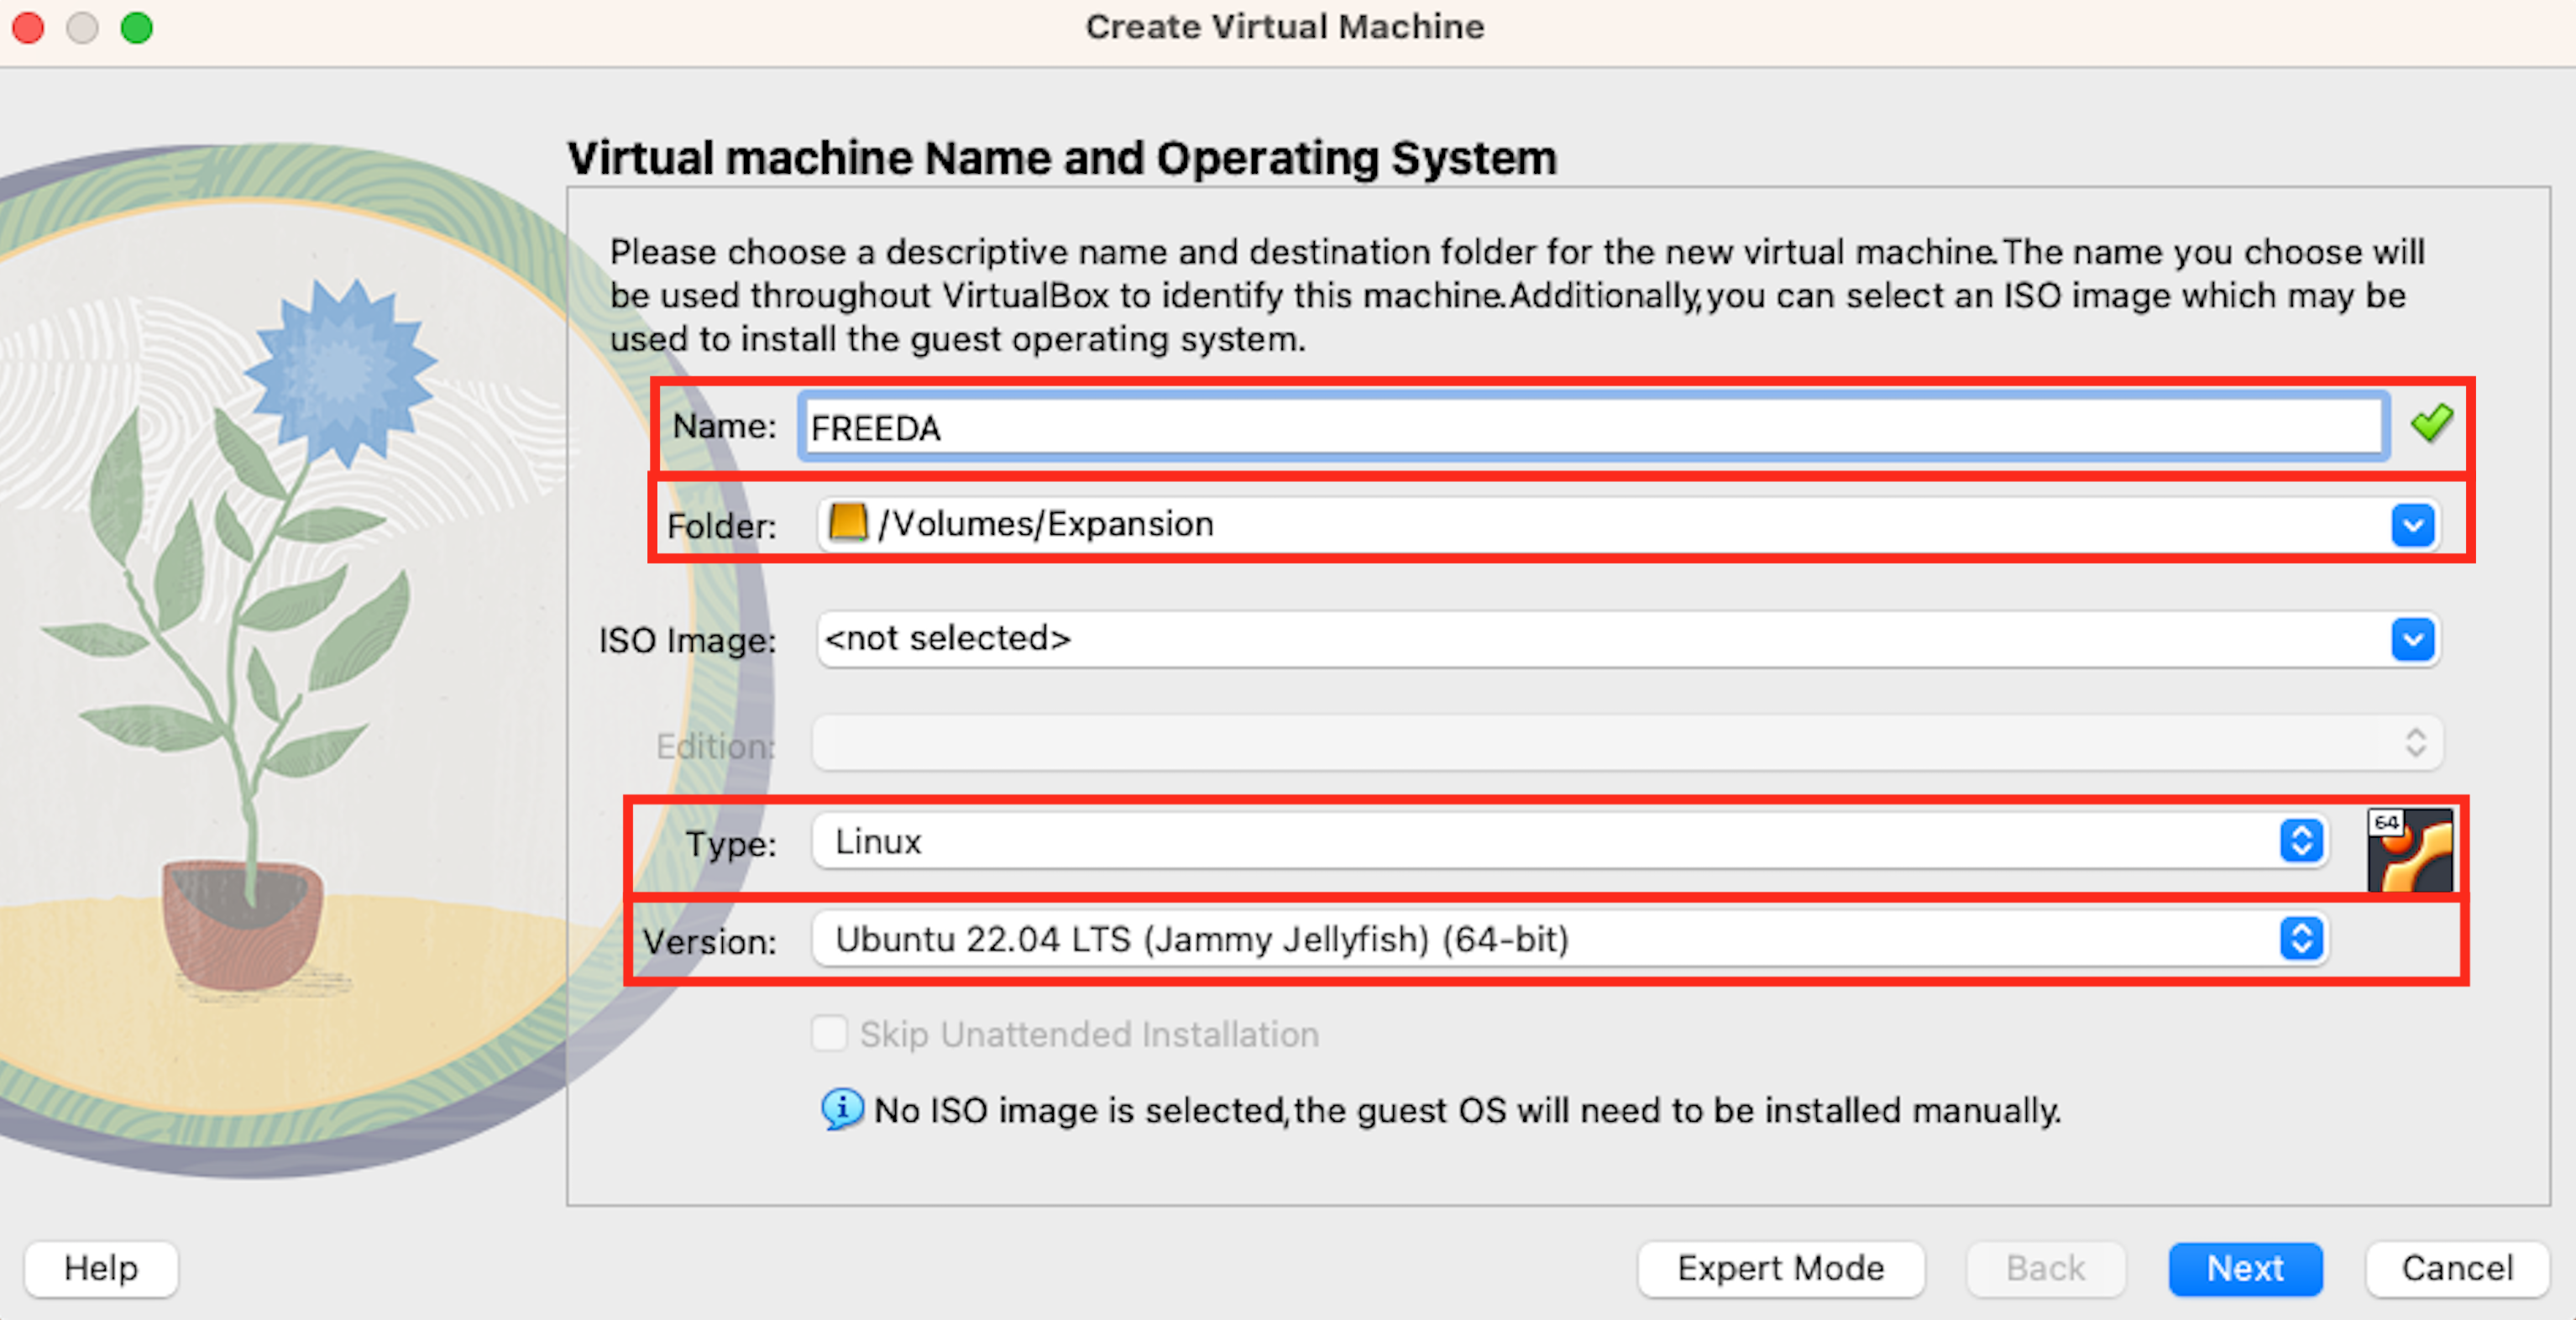
Next, enter a name and installation location for your virtual machine. Choose "Linux" for the type and "Ubuntu 22.04 LTS (Jammy Jellyfish) (64-bit)" for the version.
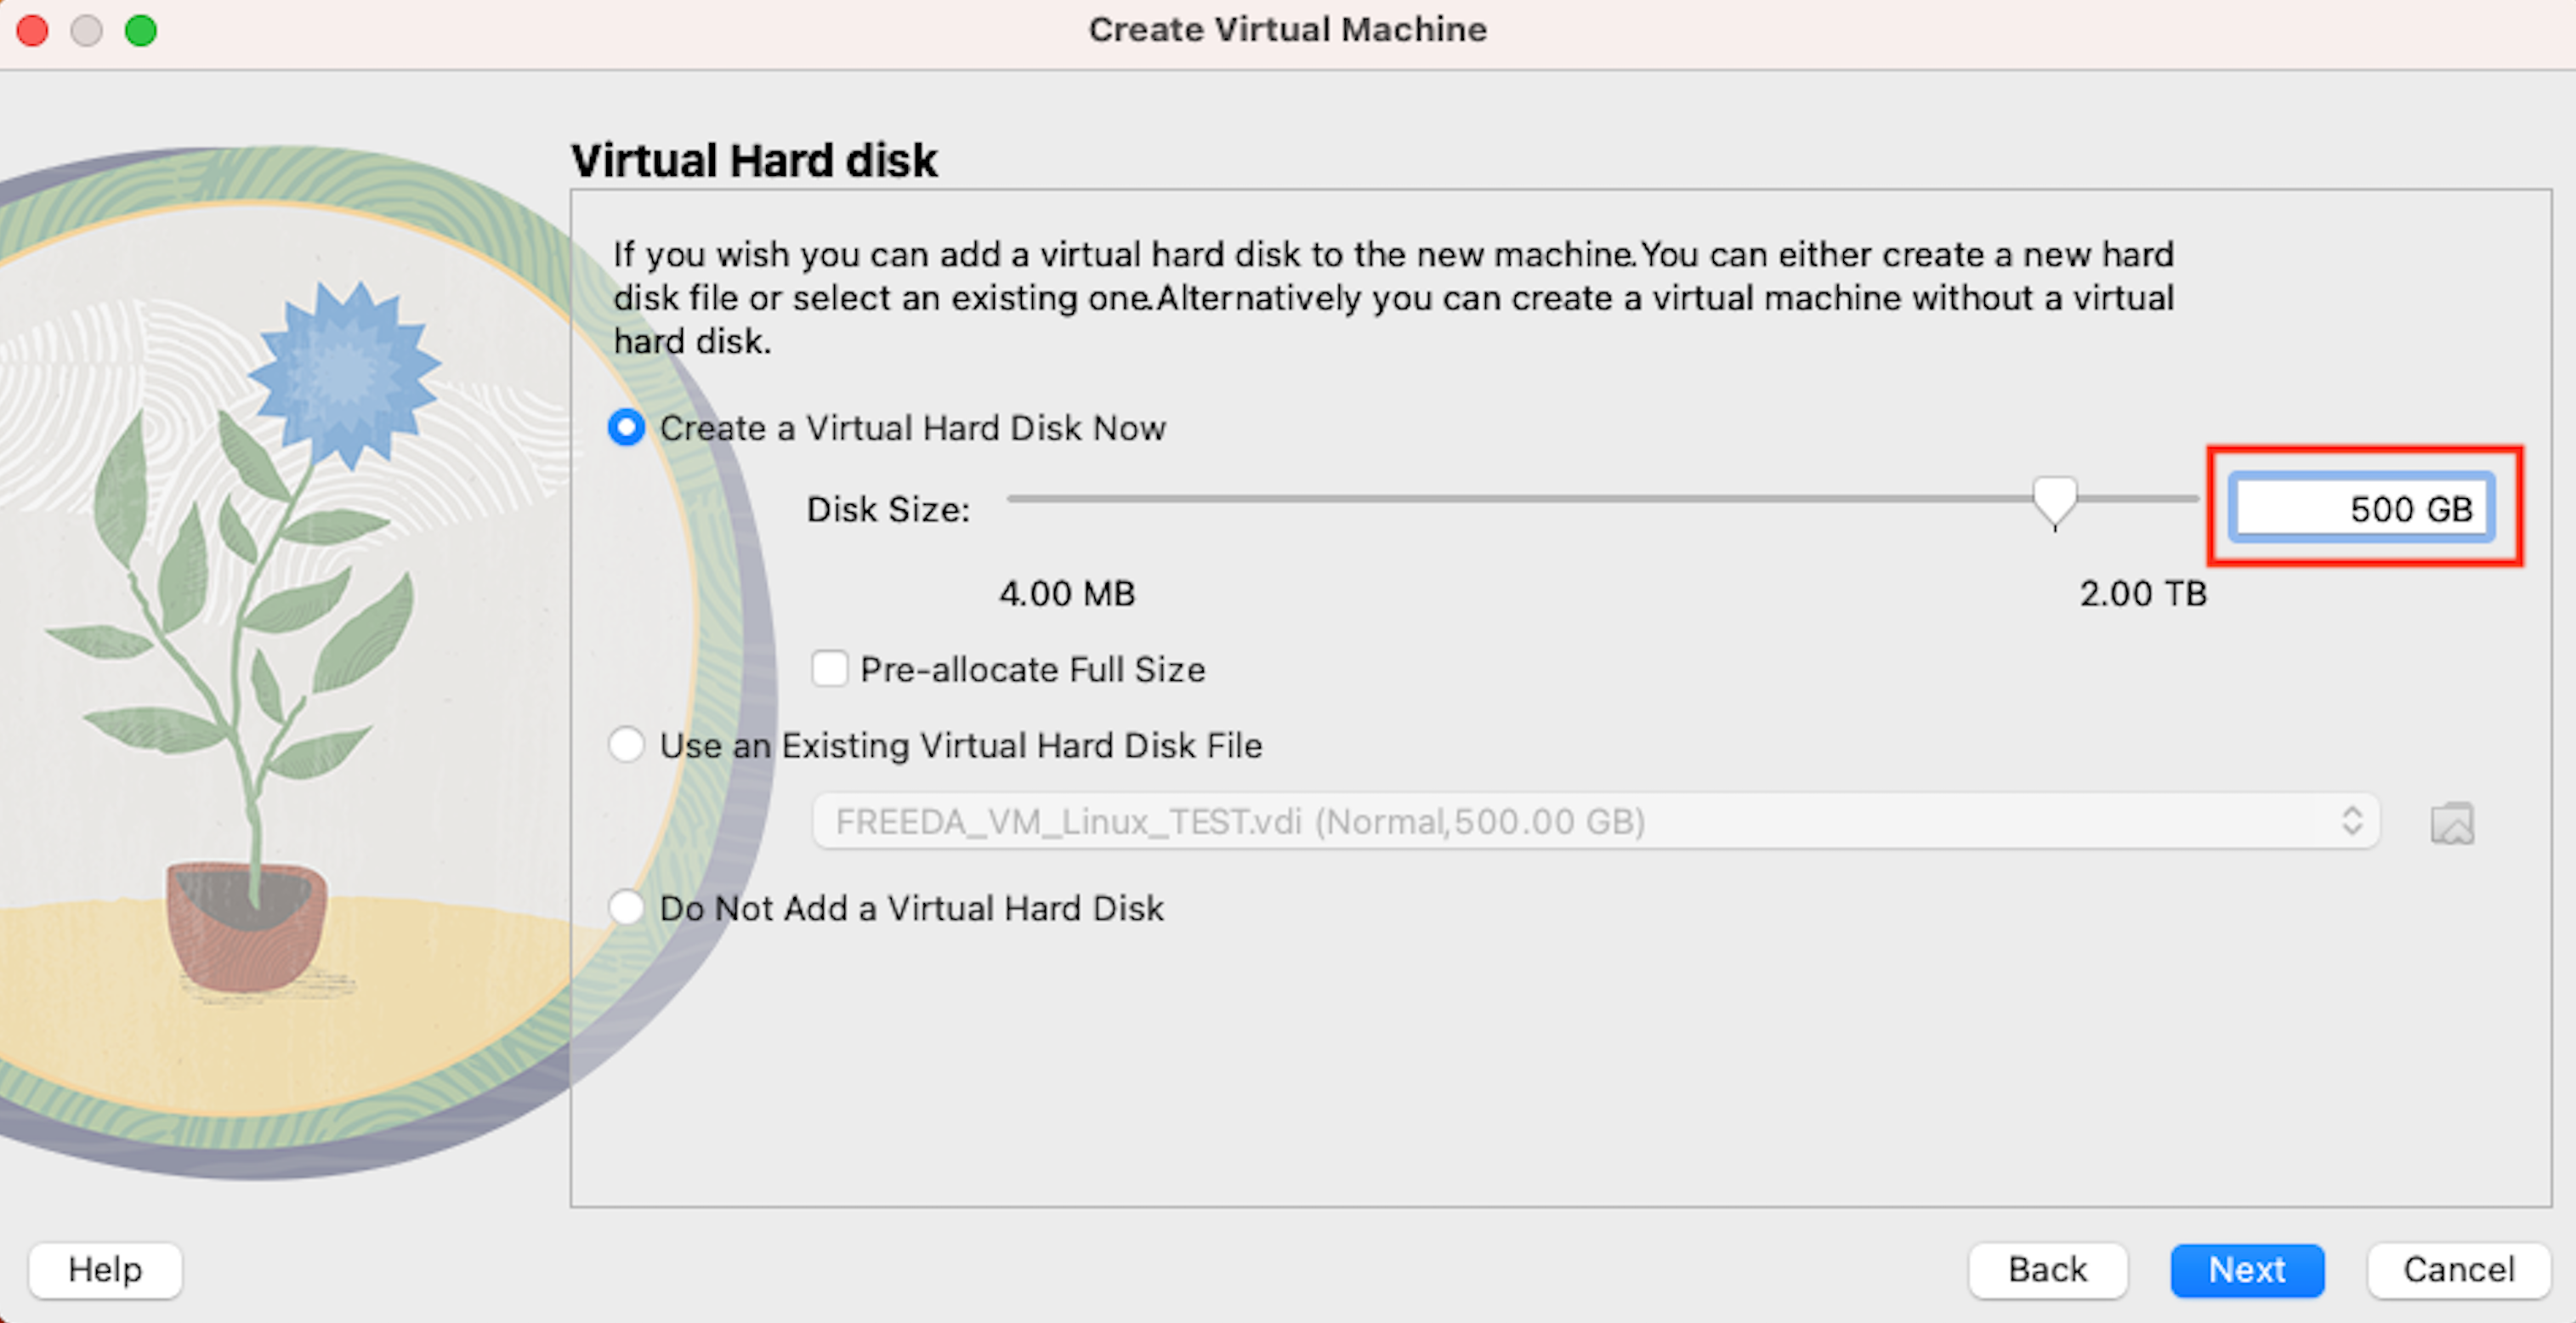
On the next screen select disk space. We recommend allocating 500GB to ensure you dont run out of space! YOU CANNOT CHANGE THAT LATER.
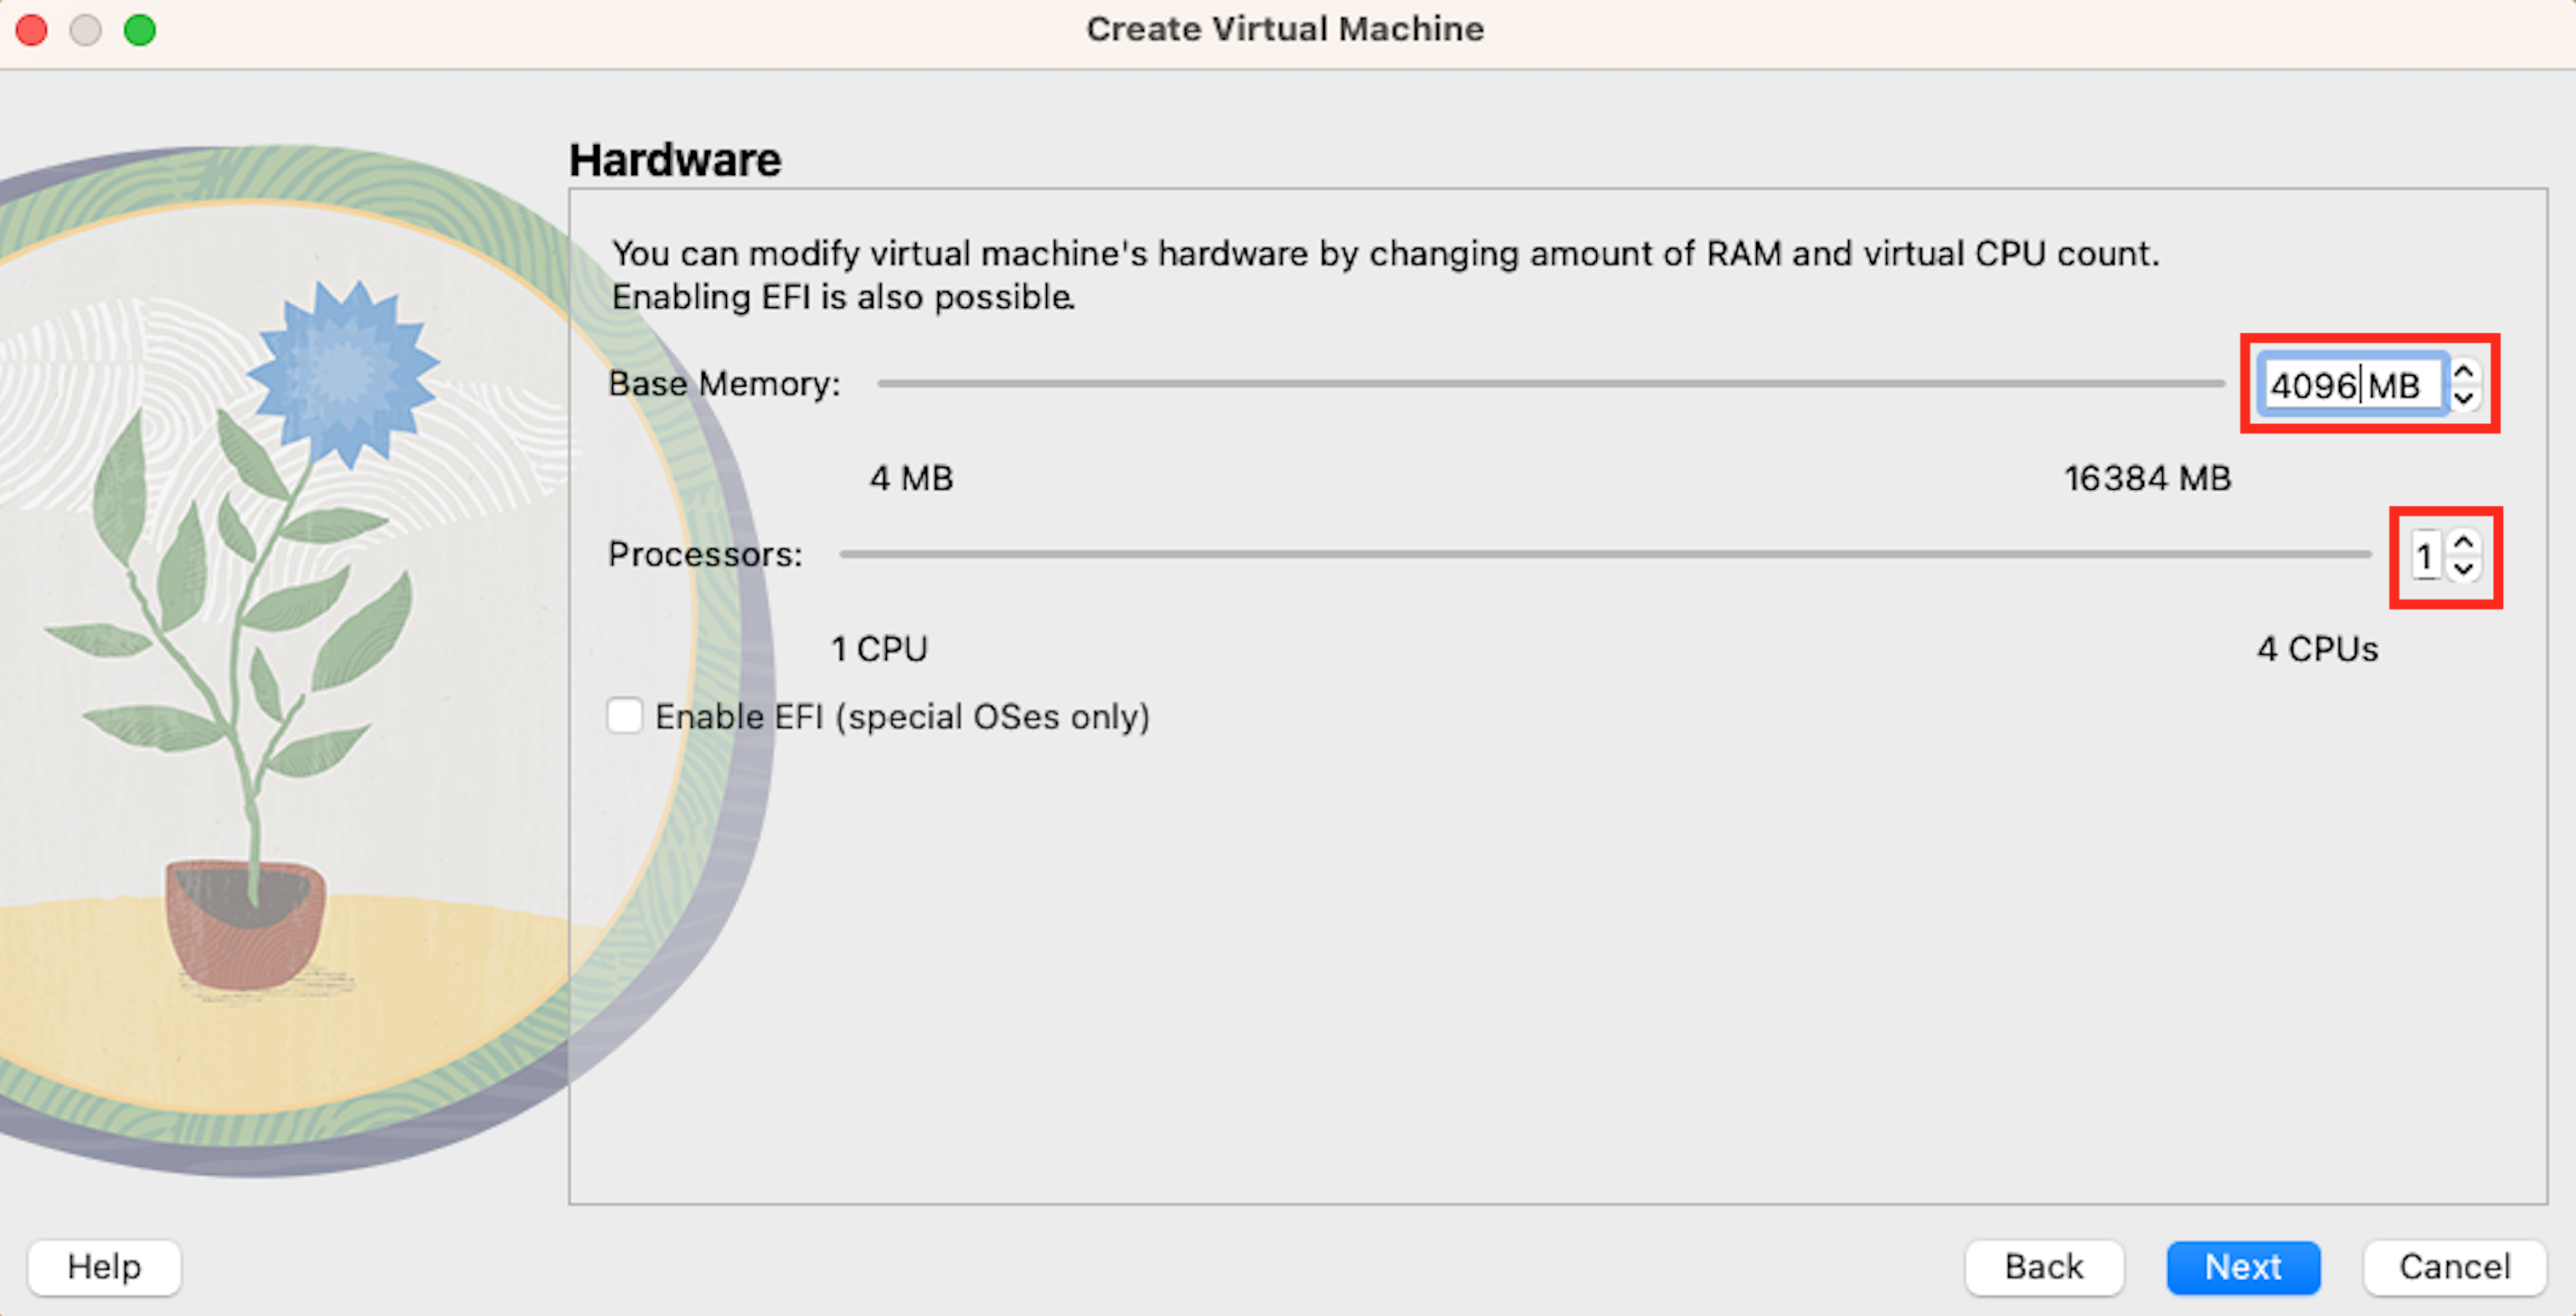
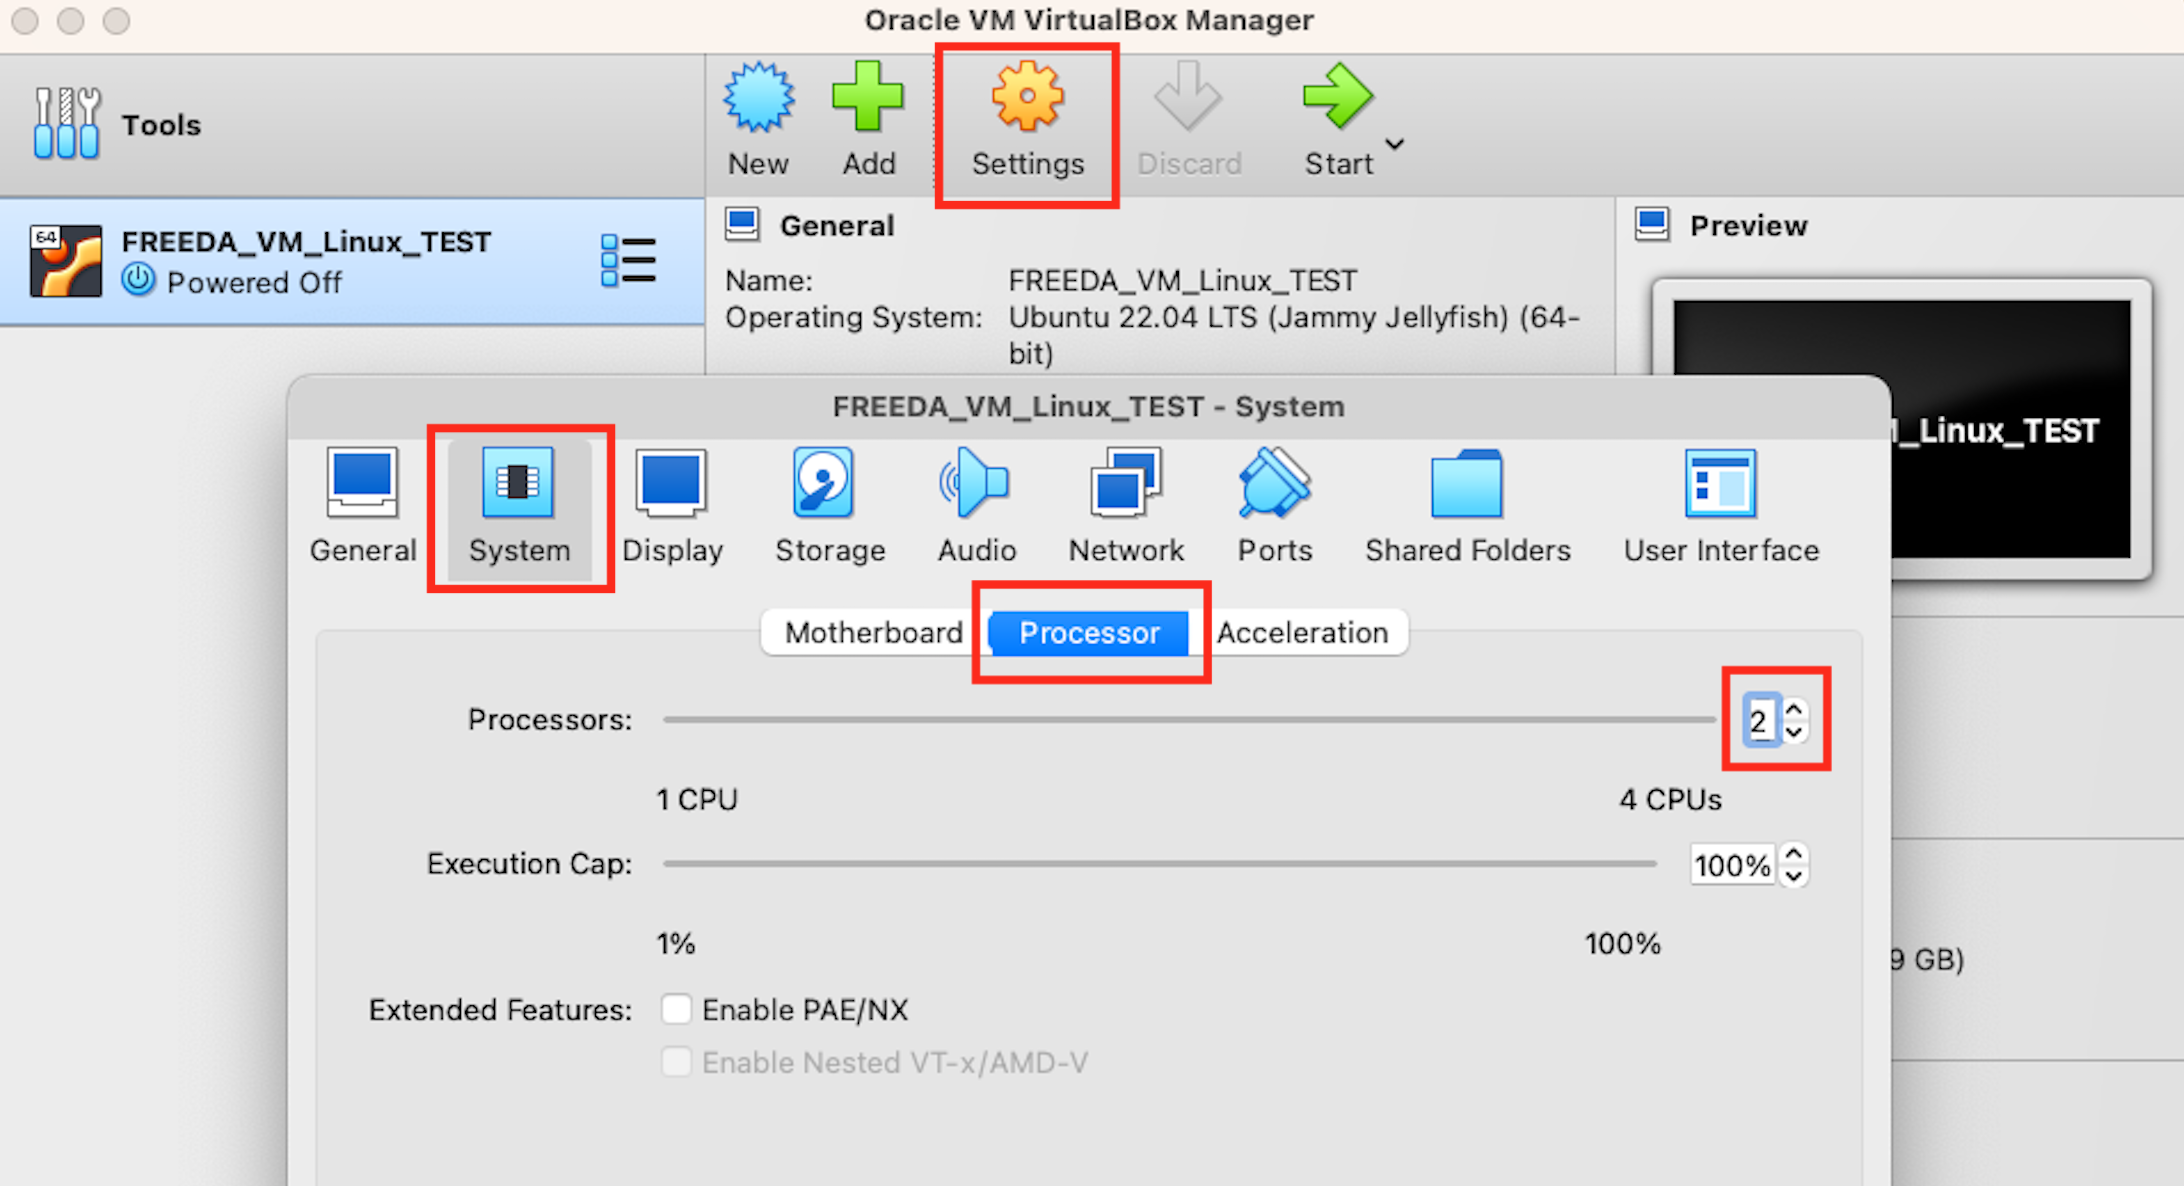
Next allocate RAM and CPU units for the virtual machine. At least 6GB (6144MB) of RAM is recommended in this step (DO NOT allocate the maximum number available!). We recommend selecting 2 CPU units to ensure high performance and stability of your Linux (DO NOT allocate the maximum number available!). You can change both of those later.
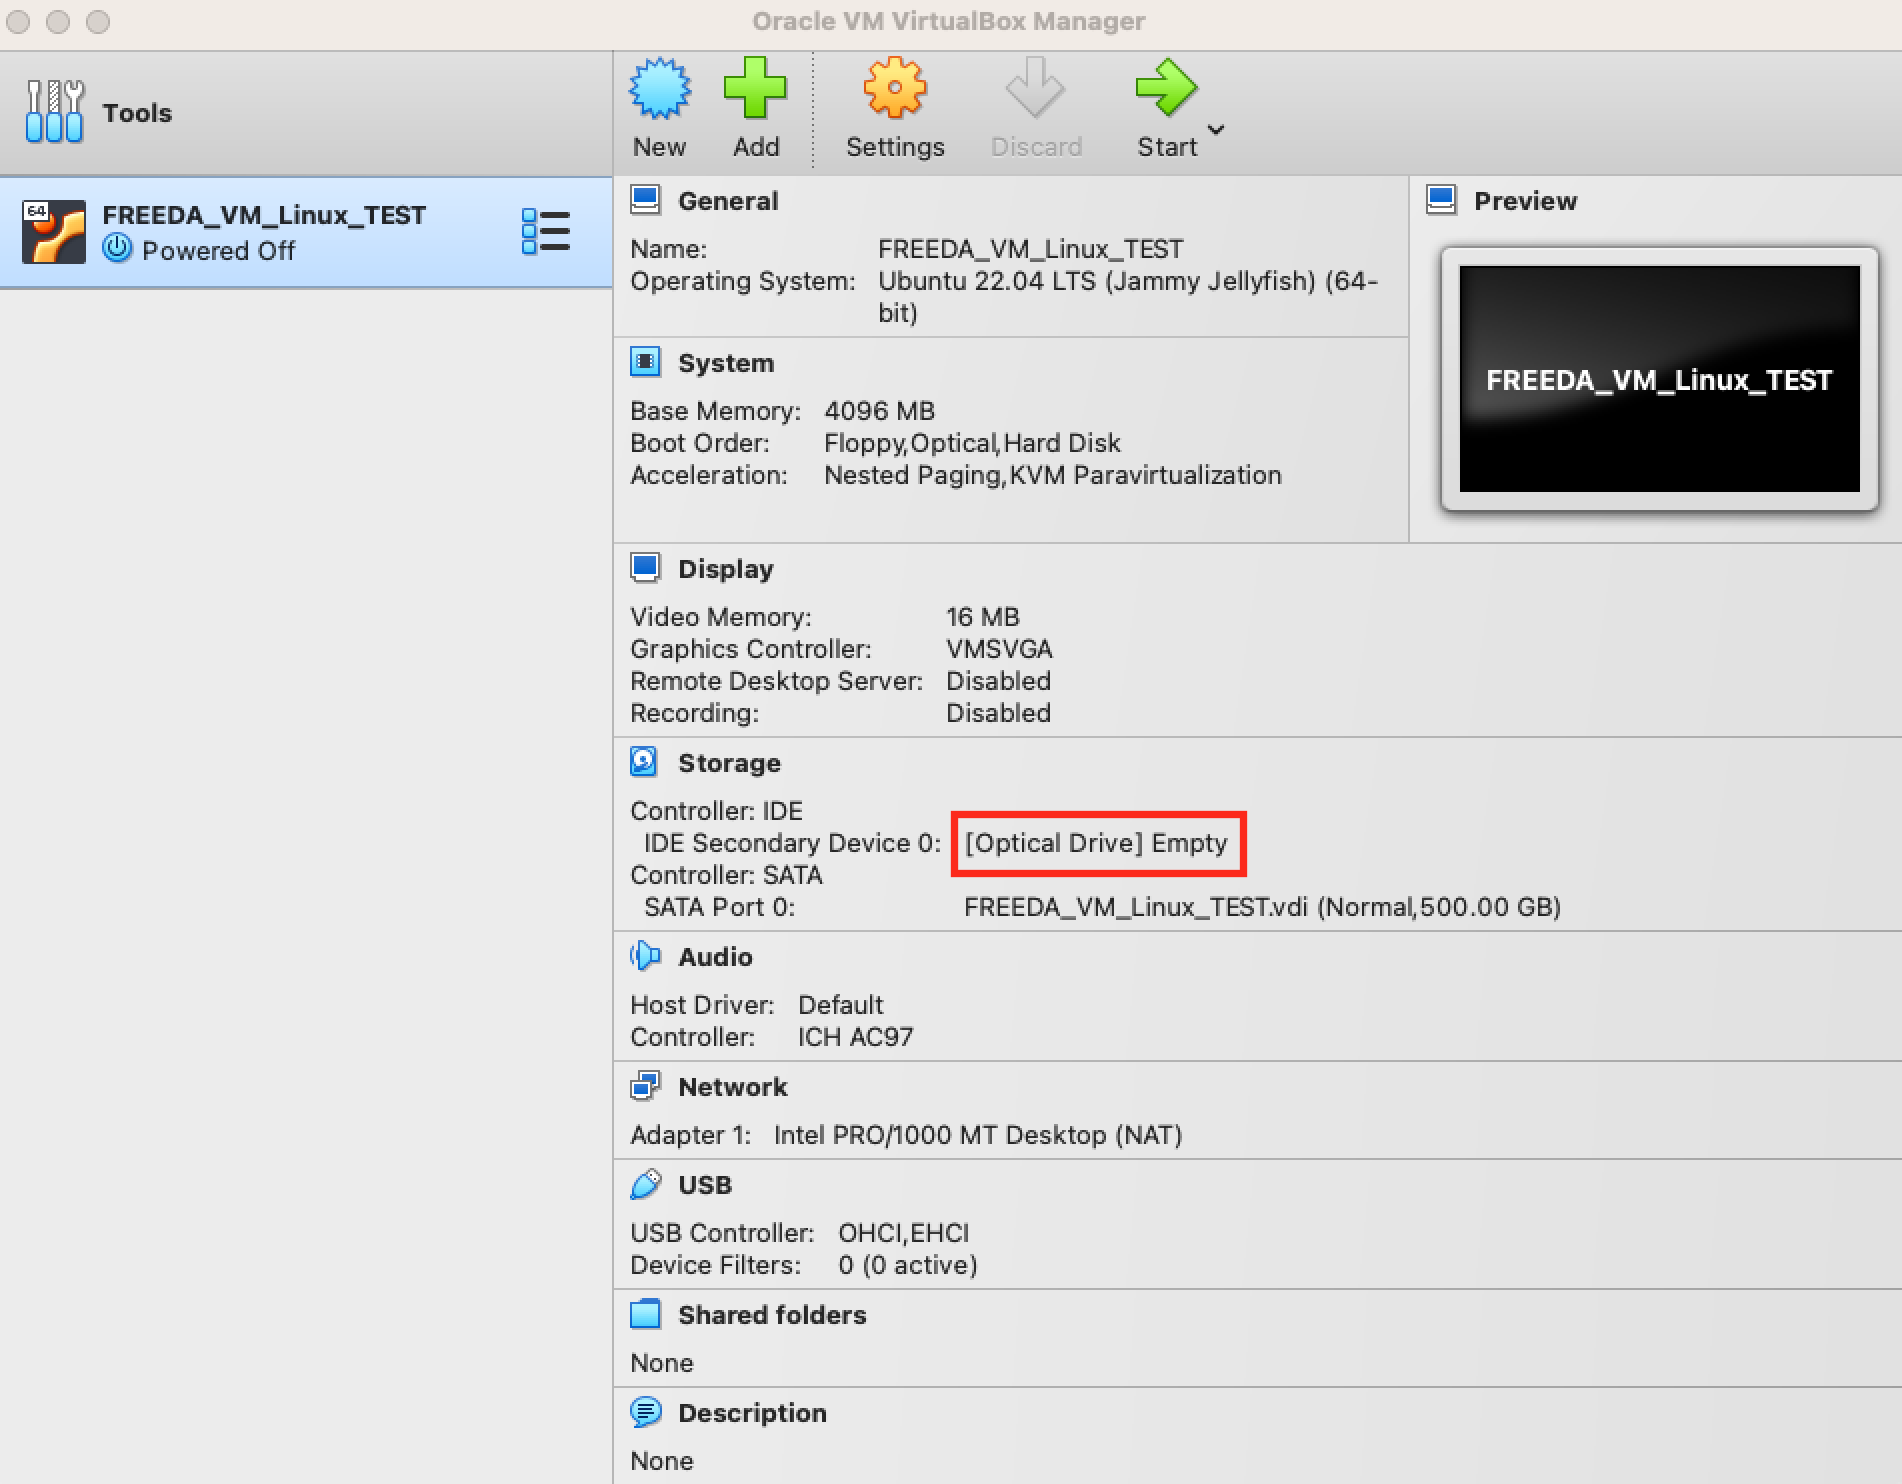
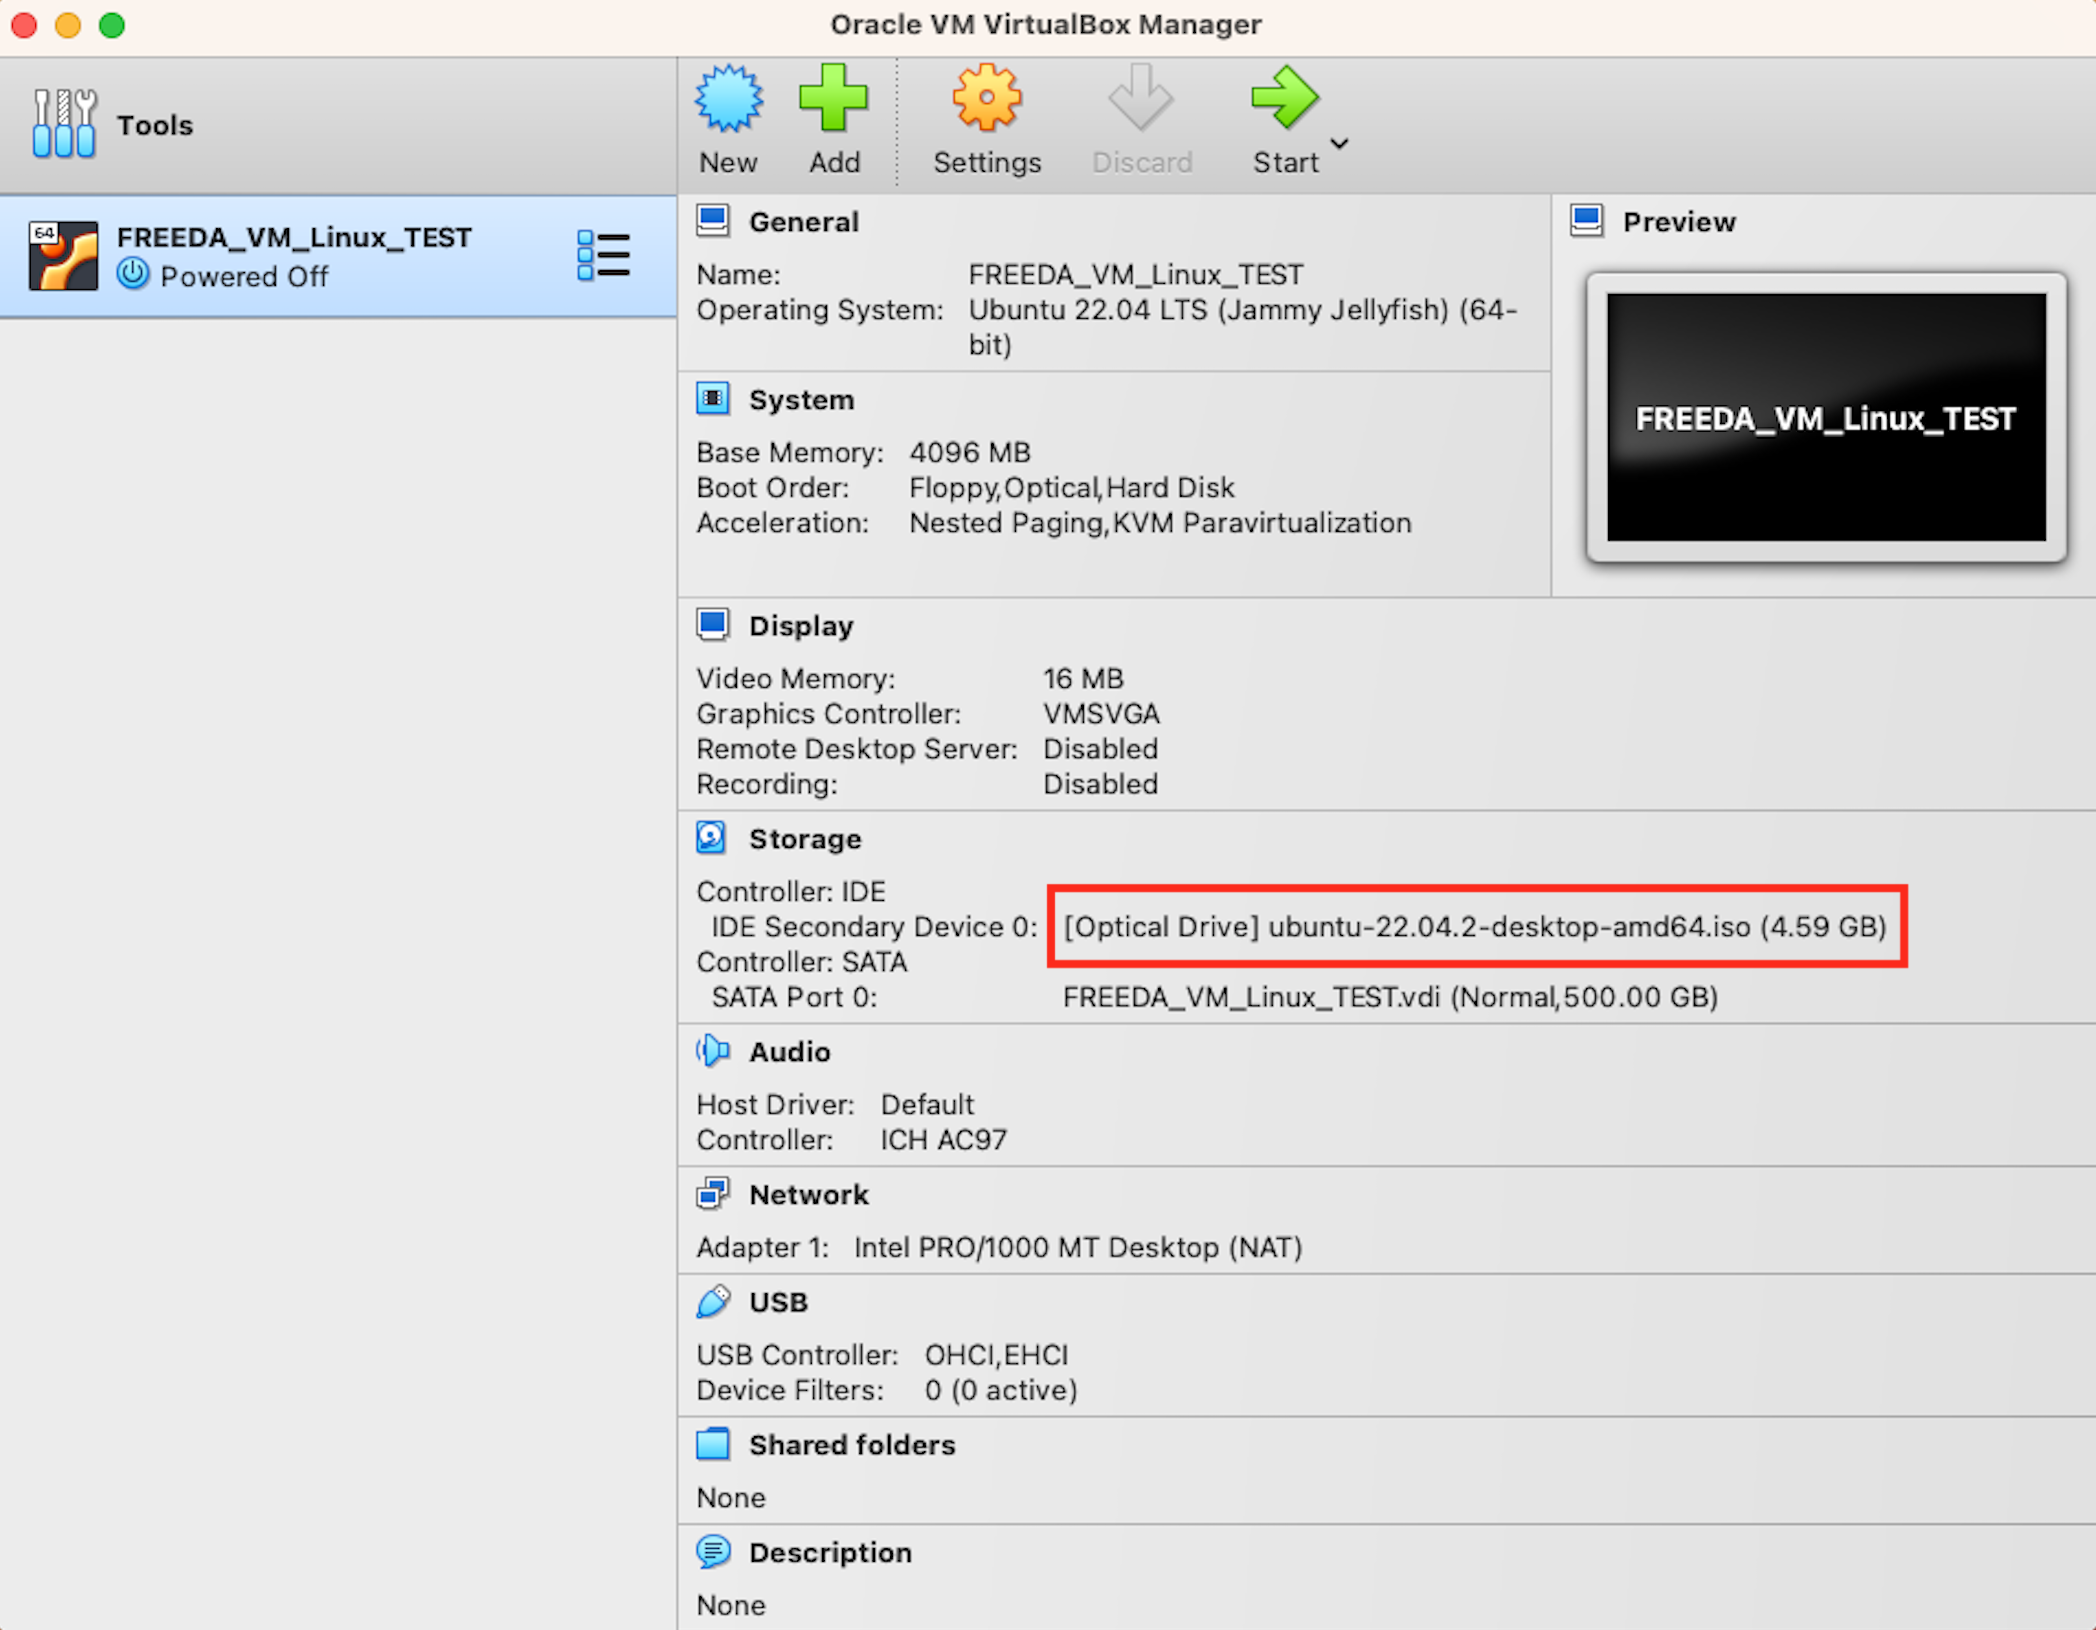
After creating the virtual machine, assign the operating system image to it by clicking the option next to IDE Secondary Device 0 and "Choosing disk file" that you downloaded earlier (.iso file).
If you selected only 1 CPU earlier, now you can increase it to 2 CPU units by going to Settings -> System -> Processor.
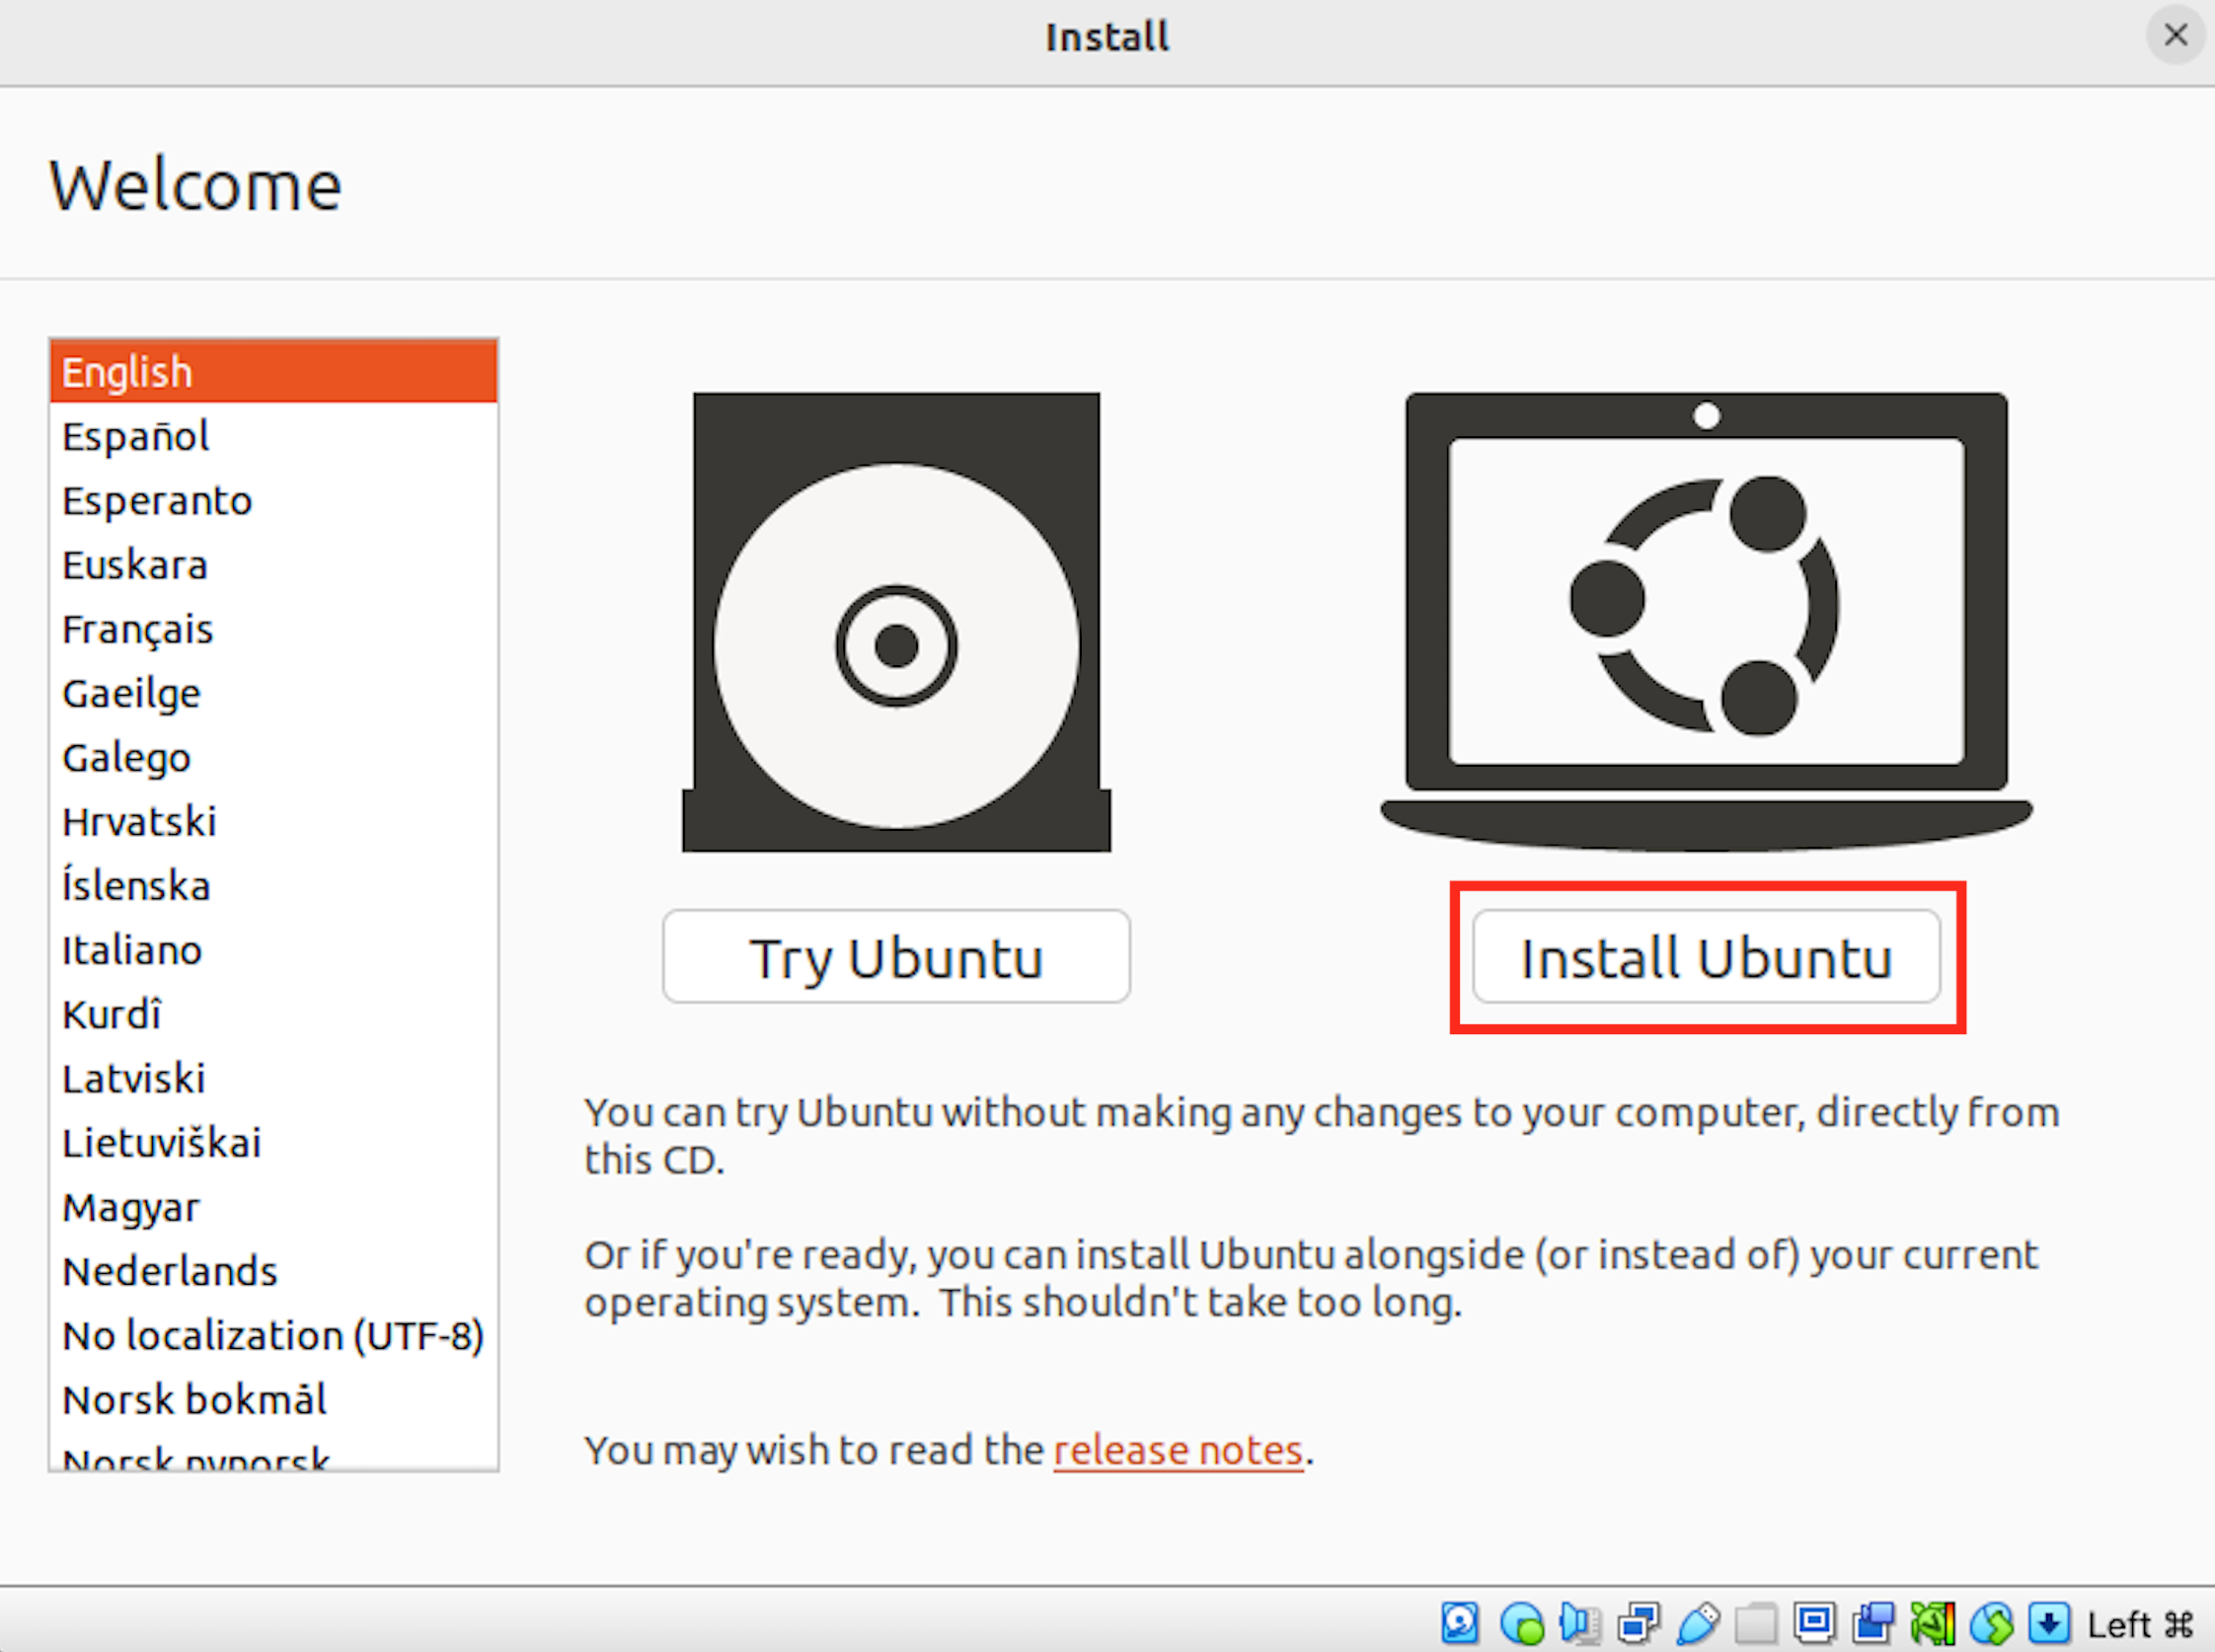
Open the virtual machine by clicking "Start". Once it has started, choose "Install Ubuntu".
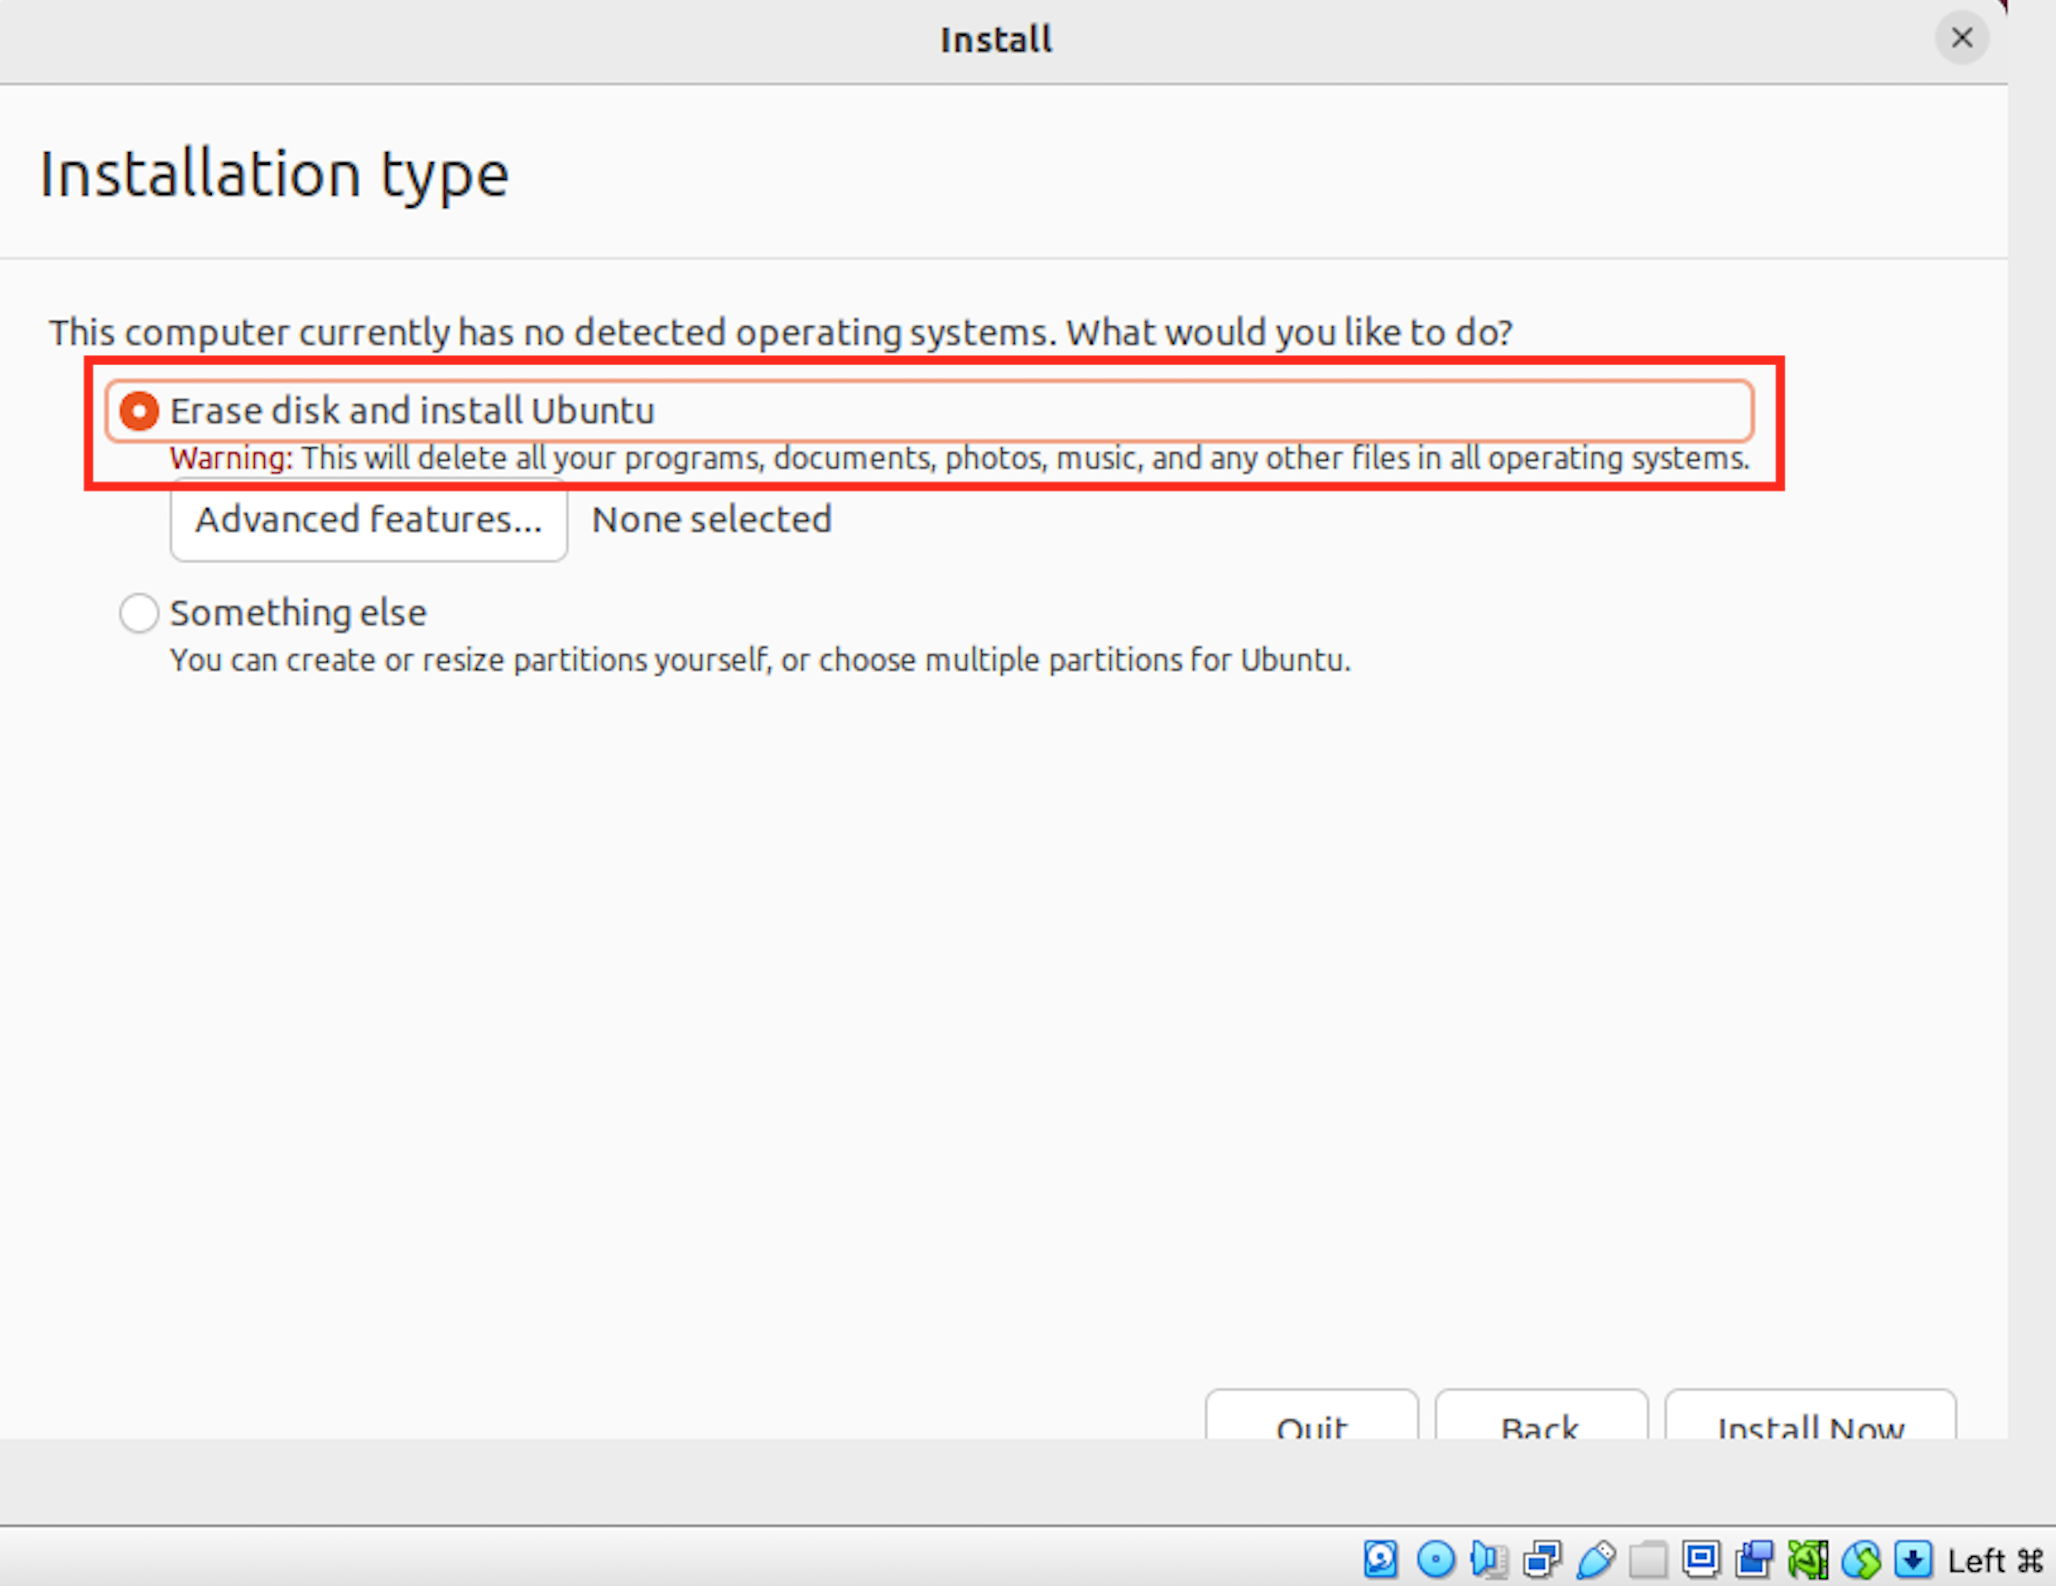
Follow the installer instructions. Note that when the screen comes up to "Erase disk and install Ubuntu" this will not affect the other files on your computer. It is only erasing the data inside the virtual machine.
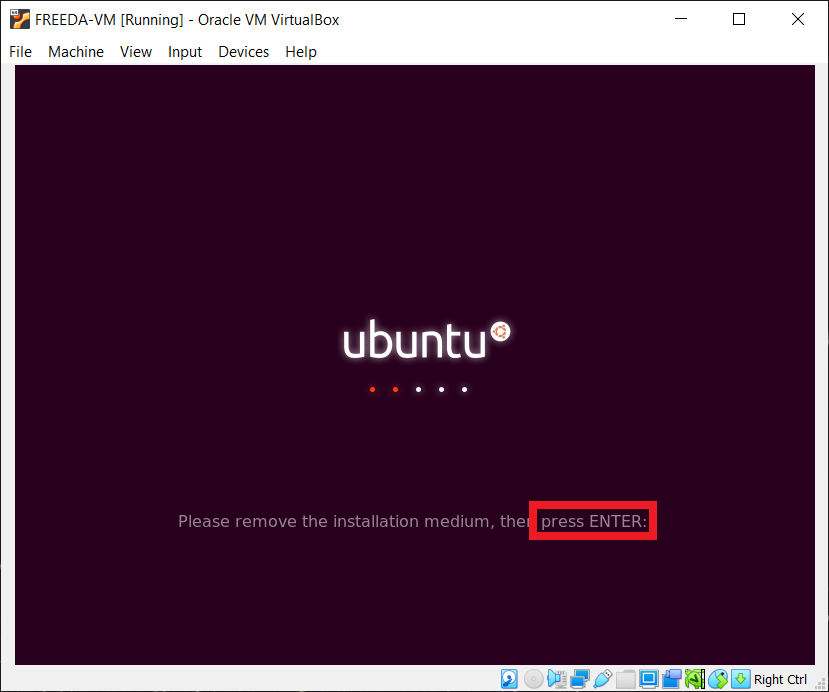
Continue with the installation. When it is complete, the virtual machine will restart. When it asks to "remove the installation medium", just press ENTER.
If the installation has been completed successfully, the virtual machine should boot to a desktop image.

Finally, we suggest increasing the resolution of the VirtualBox Linux window. Settings (right top corner) -> Displays -> Resolution 1360x768) to make sure the GUI fits the screen. We also suggest preventing sleeping -> Settings -> Power -> Screen Blank -> Never to ensure uninterrupted analysis.
Congratulations! To run FREEDA in VirtualBox just follow instructions for (Linux) -> remember that you will have to download FREEDA within your VirtualBox (best is to open Mozilla Firefox that is automatically installed by Linux and go to https://github.com/DDudka9/freeda/releases/tag/v1.0.10-linux)